Dicer - The miniature digital dice box
Background:
A few years ago, I saw a video by Abe's projects on a small, handheld gaming device that emulates a bunch of different type of dice. Watching the video, thinking it's a cool project and moving on.
"I built the ultimate tabletop gaming gadget" by Abe's projects
Very recently, I got into a new game that requires a bunch of dice to be thrown at the same time, you can already see where this is going...
So around a month ago, I got the idea for a small, handheld device that lets you simulate a bunch of dice being thrown in a bunch of different types at the same time, and I got reminded of the video.
At the time I completely forgot how Abe actually did it, I just remembered the basic idea.
He used a Raspberry Pi Pico and a custom pcb, I didn't have these parts, and I wanted a quick project to make, preferably without having to order parts.
Looking around my piles of spare parts, and unused projects, an idea started to form....
The Idea:
salvaging from a project that I didn't really use, a Vr body tracker, I got a XIAO-ESP32C3 by Seeed Studios and an accelerometer-gyroscope module(GY-521).
I also had a small OLED display that I had lying around in my new parts bag.
combined with some menu buttons, and a battery, I have my parts.
The idea was this:
a simple menu, where you can scroll between different types of dice(D6,D4,D12,D20...) and you can queue up how many dice that you want.
then you shake the dice(just like you will do with a die in you hand) to roll all of them.
the device will show you the sum of all dice, and details about each die on its own.
reshaking the device will reroll the same queue.
The Prototype:
with the idea set and the parts picked, I turned to Google's Gemini to help me with the code, because if I had done the menu by myself, this would have taken weeks to get done....
I primarily program in C#, I do understand and I can write amateur Arduino C++, but it's not my main programing language.
I started by laying out the buttons and screen on my breadboard to prototype the menu before adding the queuing and shaking.
The screen connects via SPI and the buttons are just connecting to GND and to the Arduino.
(Show video of prototype menu)
Afterward, I started working on the queuing and shaking, and by working, again, Gemini did most of the work...
The gyroscope/accelerometer connects via I2C to the Arduino and its looking for accelerations above a certain threshold to trigger the scramble.
the Arduino also uses some of the raw accelerometer data as a part of the seed for the randomization algorithm, to add a bit more randomization into the mix, because the raw accelerometer data is very noisy and our hands are pretty shaky.
(Show video of shaking working)
The Final Product:
after having the concept and prototype fully working, and adding all the features I want, it was time to start working on a case and to make it actually portable.
after a bit of time with SOLIDWORKS, I designed a nice, easy to install case for the components, with screw holes for the screen, a solid, stable place to install the accelerometer, a backing plate for the pushbuttons so they won't move, and a slot for the power switch. also a little stand for the Arduino with a hole for the usb port.
P.S: Another one of the reasons why I chose the ESP32C3 and not just an Arduino nano. is because it has native battery + / - pins and a battery charger built in, so that saves me a component which I didn't have at the time.
The case was 3D printed on my Prusa MK4S in white PLA plastic.
I printed it once, but had to print it again since the usb-c hole was too low and there wasn't a spot for the power switch.
(show pictures of the case printed and in Solidworks)
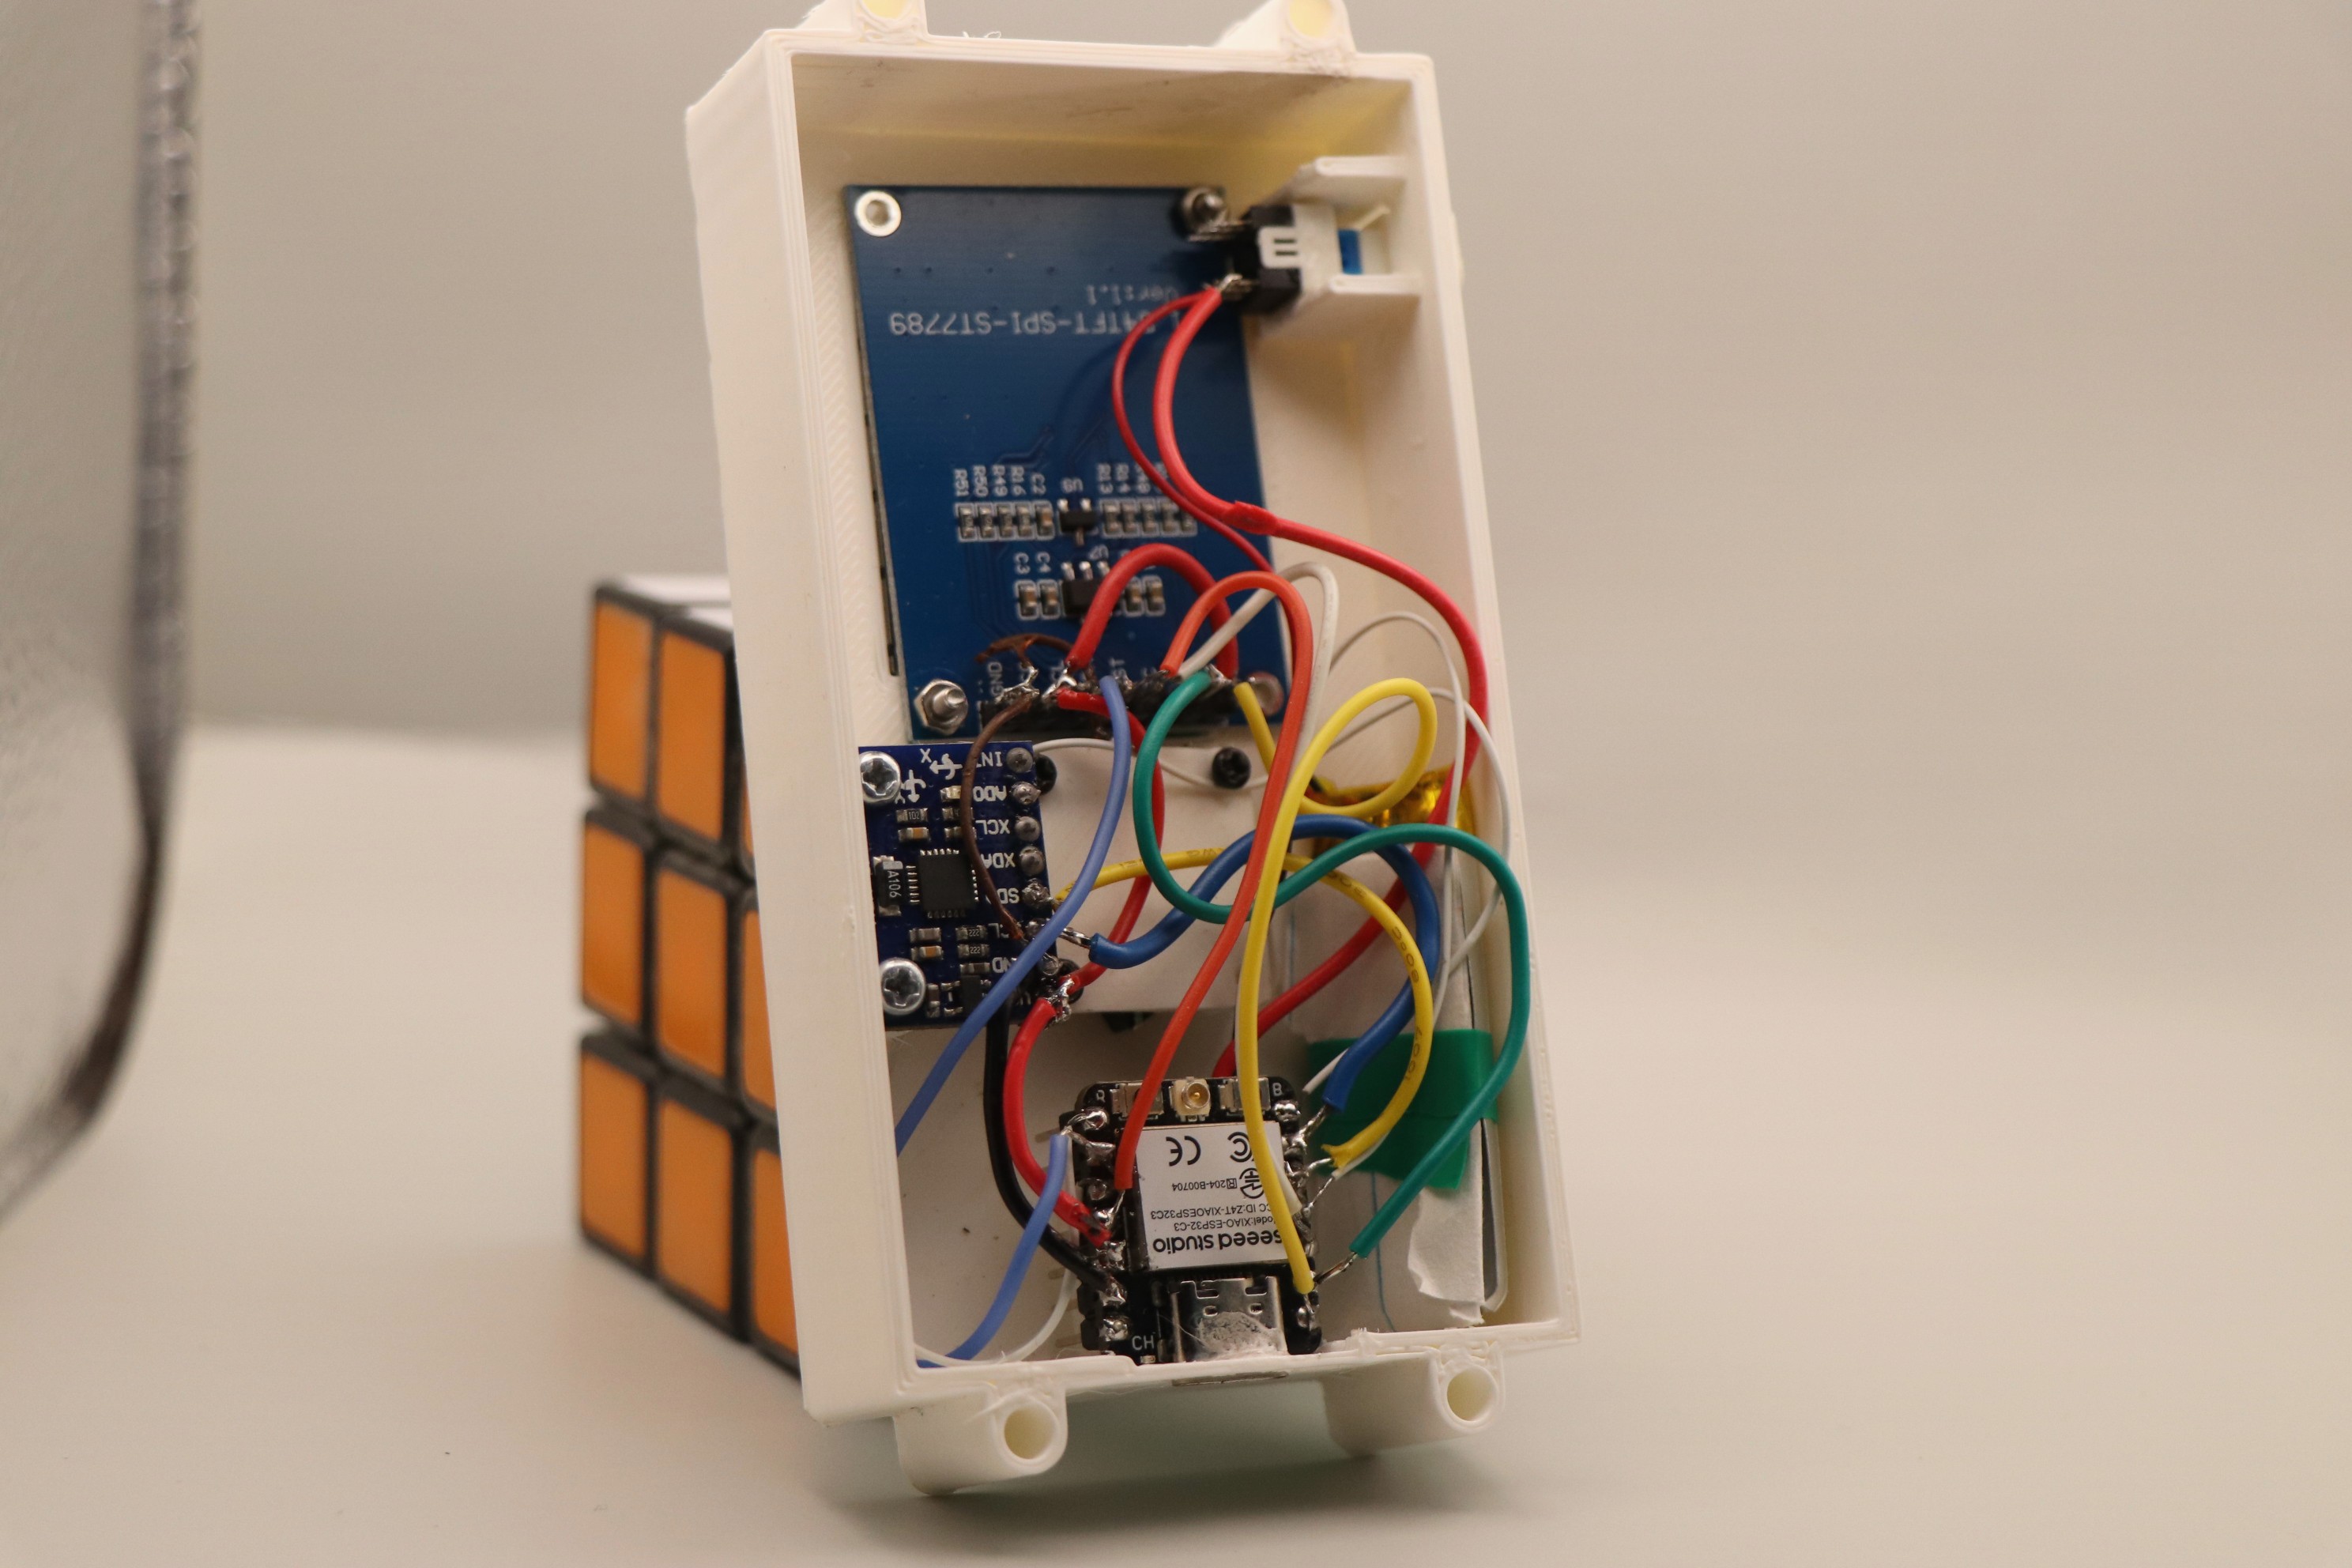
After the case was finalized, I installed all the components inside and soldered them with random wires from the magical wire box.
(show picture of the components soldered inside)
And that's it! overall it took less than a week from the idea to a finished product.
All the code and case files are going to be on my Github.
(link to Github and video of final product)